KRAFTS AND MORE!

Contents of this blog: Original hand crafted wood items, crochet, sewing, knitting, painting, drawing and also some How to's and craft tips thrown in! Enjoy!
Showing posts with label card crafts. Show all posts

Monday, January 9, 2017

My Best two friends were Carpenters....

My wonderful sweet husband succumbed to the horrible cancer Multiple Myeloma on Thursday, January 26, 2011 at 5:15pm.  He died an agonizing 12 hour death and he held my hand until the last breath.  I gave in to have Hospice help the last 3 days when I could no longer lift him.  They were absolutely wonderful and supportive and I cannot praise them enough.  They never took his care away from me but supported me with medical knowledge as well as loving hugs.  We all bonded including Bill in just those short 3 days of knowing one another.  When Bill passed, they wept right along with us.

Bill doing what he loved best!  Taken on Owasco Lake in Auburn NY several fall seasons ago...
And here is a picture of my honey, the carpenter busy in the shed  in the 90's.  He was always building and creating.

The hammer is still, the saw is silent.  The house is filled with his love though and I feel its warmth all around me.  Thanking all of you who have traveled this journey with us.  You saved me when I was lonely, had questions or just depressed.  You shared your own experiences and always tried to make Bill and myself feel better.  What would I have done without my blogs when we were housebound?  Thank you sweet friends, I love you all.  Hugs, Kerrie


I wrote a song to him once about MY BEST FRIEND IS A CARPENTER....  And it is about the Lord but also about my Carpenter Bill.  I will share with you some day....

Saturday, April 7, 2012

Recipe and Neat Pincushion links


We are in love with this--Apple Pie Baked in the Apple.


You will need 6 granny smith apples, 1 pie crust, 1/4 cup sugar and 1tablespoon brown sugar. 

  Cut off the top of 4 apples off and discard. Remove the inside of each apple with a spoon very carefully, as to not puncture the peel. 
  Remove skin from 2 additional apples and slice very thinly. These apple pieces will give you filling needed to fill the four apples you are baking. Mix sliced apples with sugars and cinnamon in a bowl. If you prefer more or less cinnamon and sugar, make adjustments as desired. 
  Scoop sliced apples into hollow apples. Roll out pie crust and slice into 1/4 inch strips. You can also add a strip of pastry inside the top of the apple almost like a liner to add a little more texture/sweetness to the pie. Cover the top of the apple in a lattice pattern with pie crust strips. Place apples in an 8×8 pan. Add just enough water to the cover the bottom of the pan. 

  Cover with foil and bake for 20-25 minutes. Remove foil and bake for an additional 20 minutes or until crust is golden brown and sliced apples are soft.


Here is the link for a free pattern for this little cutie of a pincushion!  Just click on Riley Blake Designs after the pictures that Lindsay has posted of the pincushion.


Thank you for visiting today and please come again soon


 HAPPY EASTER EVERYONE!
My Krafty heart to yours...

Tuesday, June 14, 2011

Pinwheel Quilt Pattern...

I have wanted to make a pinwheel patterned quilt forever!  Even though I am still working on two larger quilts (Cathedral Window and a Yo-Yo Quilt), I was given a book with the pinwheel pattern in it just last week and had to start this lap quilt!!  I love the way it is coming out!
I did 3 blocks on  Sunday and three more yesterday!

This is how it looks today after ironing the seams and now having 6 blocks completed.


I just love the way it is turning out.  One thing I notice though when joining the blocks was that there is some irregularity in the sizes.  I am thinking it is because I did not pay strict attention to cutting on the bias??  Okay you very experienced and pro quilters, is this the reason?  My other quilts are sewn together by hand but this one is being done on my machine so I am noticing the difference.  My hand sewn quilts make it much easier to ease in the joining if there is a small discrepancy.  This Pinwheel pattern is so much fun to work with and the blocks are very large so it should work up quickly.  This will be a lap quilt size. 
   WE are still working on our lighthouse paintings and hope to be done soon.  We got to camp for a couple of days last week and away from cancer treatments--a joy!
  Thanks for coming and do come again,

Saturday, June 4, 2011

Something from Nothing...Little Pink Book

Happy Pink Saturday to you!  What is Pink Saturday??  It is hosted by Beverly at How Sweet The Sound and is celebrating 3 yrs. last month.  If you love Pink and you blog, all you have to do is post something you like on Saturdays and if you are not a blogger but just love to visit them, this is the place for you!  My pink Saturday offering today is this Little Pink Book I just made!
And this is how I made something from nothing....
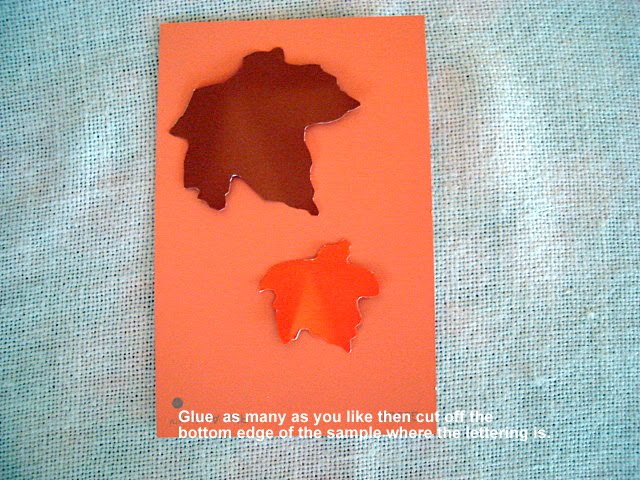
I used Martha Stewart paint samples from the local Home Depot Store.
I glued 2 of them back to back for the cover and did the same for the back.  You know those cute little metal frames that you buy in the dollar store with vintage pictures of people you do not know but love?  I took the picture out of the frame and pasted it to the front of my little Pink Book.
Next I punched holes in my covers and found faded pink ribbon among my stash to lace the covers together with pages I made from Index cards....
I punched holes in the index cards.  Next I laced them together with the ribbon.
This is what the inside of the book looks like.
This is the back of my little book.  I loved these paint samples as they looked like leather.
Then I added a little embellishment with some flat half pearls that come on a tiny sheet and are already tacky. I also had these in my card making supplies but they are very inexpensive in the craft stores and Walmart.
And here is my finished Little Pink Book with 12 pages that I can write sentiments in or phone numbers or whatever!  I added the Christian saying from a teabag tag that I had. (my daughter gave me a whole box of green tea with
Bible sayings on them for Mother's Day)
I love it!
And the little frame??  I put Mama in it!
Thanks for coming and do come again.  I hope you enjoyed my Pink Saturday How-To.
♥KERRIE♥
My Krafty heart to yours...


Saturday, August 14, 2010

Crafting tips and cards

Happy Saturday to you!  I have updated my other blogs and pls. visit when you can.  Links are in the sidebar for Kerrie's Korner, SC and for TWO HAPPY.
Today I want to share the great ideas for making your own cards.  I pick up paint samples whenever I visit Lowe's or Home Depot.  They have such a great variety of colors and textures.  I use them for cutting out flower petals and for labels on my home made greeting cards .  I will show you below.  I always save cards sent to me that have see-through designs and then in turn use them for templates to cut shapes for my cards. I use an old ink pen that has run out of ink to trace with and that way you do not have to worry about Ink or pencil marks on your cut-outs.


If you enjoyed this little tutorial, please leave a comment and I will work on some others for you.
Thanks for visiting!  And check out my other blogs - links are in the sidebar.  Have a wonderful weekend!