KRAFTS AND MORE!

Contents of this blog: Original hand crafted wood items, crochet, sewing, knitting, painting, drawing and also some How to's and craft tips thrown in! Enjoy!

Friday, October 14, 2011

Paper Pom Poms

Today I am sharing a craft from the Sewing Loft.  I can't wait to try them and so wanted to share with you right away.  For this time of year I was thinking of lightly spray painting with orange paint.  I hope you make some and send me your results.  Have fun!

Today's craft is super simple. I mean really simple & no cost. The kids made them with me so, they were super fun!!
Let's face it, we all have news paper hanging around the house but what do you do with it? Since my recycling bin was full and the girls were looking for a craft project... the paper pom pom was put into action.
These can be made any size and can be used in so many ways.

Party Decor
Garland
Flowers
Pretty Packaging
Holiday Ornaments
My girls like the party decor.. So that will be the focus for today's craft!
This project is for sewers of all levels.
Skill Level- 1 Button

Materials:
Newspaper
Craft Paint or Watercolors & Brush (Or Orange and yellow and red spray paint.)
Needle
Thread
Scissors
Basic instructions:
Cut many squares of news paper. (*If you have a rotary cutter, you can cut several layers of paper at a time. )

Then I handed the squares off to the girls and let the painting begin! After a quick dry in the sun, you are ready to move on to the next step.
Fold the paper squares as photos. I folded 15 to create my pom pom.
With needle and thread (approx 20" long), stitch through the pointed corner of each petal.  Be sure to leave approx 10" of thread on each side for hanging.
Repeat the process. For pom poms in photo, I used around 15 petals, 5" square.
Tie in knot.
Pull apart each petal and "fluff".
They are not as light and fluffy as tissue paper poms but these pom poms are a fun way to drama above any child's party table.

For More ideas, visit the Sewing Loft http://thesewingloftblog.com.  Happy Fall Crafting!

My crafty heart to yours...

Wednesday, October 5, 2011

Nice Halloween Cat

HERE IS A NICE HALLOWEEN CAT!  Use for greeting card or decoration.  Just right click to copy.  Again, this is from The Graphics Fairy.
Isn't he cute?  You could also use for pasting on treat bags, or for a banner when printing out several copies.  If you right click you can also print right from this page.

Sorry that this is all I have for today.  Hubby had to have 2 pints of blood today at the hospital and the transfusion took 6 1/2 hours, all told!  The day is shot but it is still sunny and a wonderful 73 degrees so not complaining!  I would love you to create with this image and send me a pick, thanks!!

My Krafty Heart to Yours...

Tuesday, September 27, 2011

Halloween fun Decorations


 I am sorry for not posting sooner.  We went camping for 3 days last week while hubby was off chemo.  It was wonderful to get away for a few days with NO Dr. appointments! 
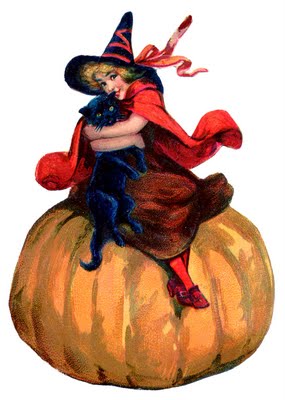
   I thought I better get a move on and share some Halloween decorations with you so you can make cards, banners, or whatever with these wonderful graphics from the Graphics Fairy There is no other site with so many free graphics anywhere!
Right click to copy or go to "file" at the top of your page and choose "save picture as".  I save mine to my picture file and when the season is over, I delete them later.


And here is a gorgeous butterfly with Autumn colors!

Suggestions for use for graphics.  Put them on lace pumpkin doilies and make cards or banners, gift tags, print as iron on's for T-shirts, etc.

I would love to see what you do with them!

graphics cut out and ready to glue on lace pumpkin doilies.

Lovely Butterfly.  For 3-D effect cut out 2 and glue them together at the feet of the butterfly.
And this witch with the moon and bat would look great on a banner for a party or just for Halloween decorating.  Or photograph and make copies for Halloween greeting cards.

Thanks for coming and do come again soon.  If you have time, check out my other blogs.  My most recent blog (listed in sidebar) is my original poetry.

My Krafty heart to yours...


The above graphics are taken from vintage post cards, I love them!

Saturday, September 17, 2011

I HAVE ADDED A NEW BLOG TO MY GROUP, THE THE POETRY OF KERRIE O'HEARN MARQUART.  It features only my poetry and photography by my hubby and myself.  I hope you will enjoy reading the spiritial Christian poems as well as other subjects.  If you visit, please leave a comment.  Thank You!!

Wednesday, September 14, 2011

Kraft Notes...And Toile Valances

Good morning crafters!  Sorry for not posting for so long but hubby has been very ill for the last month with kidney failure.  It got down to only 10% and we were heading towards dialysis.  But we saw the kidney doc and a nutritionist at the hospital who gave him a kidney failure diet to follow and also recommended a nutrition drink specifically for patients with kidney failure.  Just two weeks after, another blood test showed marked improvement and his function increased 10% to everyone's surprise!  I can only conclude it was from prayers and the diet!!  We are so happy. 

Consequently, I have not worked on crafting and neither has hubby.  But now maybe we will get some projects going again.  Thanks for hanging in there with us.  I did make some Valances for our newly painted bedroom and pillow shams.  I used a beautiful fabric that is water and stain resistant.  I just looked at one of my old pillow cases to measure and sew the matching shams.  We were very pleased with the outcome.  Hubby spends a lot of time in the room and I wanted to brighten it up for him.


As you can see, I hung our finished lighhouse paintings on the walls and they look great against the blue!


Bill's is especially pretty as he has that dark patch of blue sky in his that blends so nicely with the blue walls.

Detail of Fabric


The fabric is pure white but this photo doesn't show the whiteness.  The pattern is children in blue playing, trees and has several scenes.  I love it!

  This is the corner window on my side of the bed.  We loved the open clean look with just the Valances so we did not put the sheers back up.

The lamps were purchased several years ago seperately but I already had painted them to match with the same design in blue, green and gold acrylic paint.


This picture of pieces of the fabric show more of the true color.  I am using the present quilt until my pinwheel quilt is completed.
  
   Thanks so much for visiting today and do come again soon!!  What are you crafting??

♥KERRIE♥

My crafty heart to yours...


Thursday, July 28, 2011

QUILTING TIPS

GOOD MORNING!!  I had trouble joining the squares on the Pinwheel Pattern quilt I am making and my sweet sister who has much more experience in quilting than I have has come to my rescue with some really good advice so I am sharing it with you.


   "Here's hoping this works. You may have lots of solutions by now but here are mine. It is impossible to cut any pattern on the straight of the goods...except the binding along the sides. it is all in the handling and pressing. During the sewing of pieces try not to pull on them.When pressing it is important not to move the iron back and forth.Put the piece on the board and "finger press" carefully ...the seams. Then Just put the iron on the piece and just press with out moving the iron back and forth.When putting the pieces together do the same ...handle with care. If it looks like it is a little short you can cheat by pulling at this time. If it is a little long you can fit it in. It may look wrong but you can press it. All pressing should be with steam.When putting the pieces together to make the pattern if they are not the same size You can square them up by trimming a smidgen. Before I cut any pieces out I press the fabric first
but only press.. not move the iron.Also let the pieces dry if they are a little damp.Your piece looks beautiful so far. 

Hope this helps. Love you, Mary"

Don't ya just love having an older sister?? ♥
  THANKS SO MUCH SIS AND I WILL BE HEEDING YOUR ADVICE FOR SURE!

Sure hope this will help anyone else out there that has had problems with joining pieces like I did!  Come again soon!  And if you have time, check out my other blogs with links in my sidebar-Thanks!

My Krafty heart to yours...

Friday, July 22, 2011

Collage of Favorite things....

Wishing for rain and doodling with altered art collage.  (These can be photographed and used on the face of your homemade cards, framed, or put in scrapbook page).  We need rain so badly and the thunder can be heard near by.  the skies darkened but now the sun is out without a drop of rain! 
   I was day-dreaming and made this little collage of some of my favorite things...


I adore this little vintage card with the girl pouring milk for her kitten!  I started with that card and then added things as I went along...

I collect Bird feathers all the time and others bring them to me as they know this, (smile).
And leaves, I love leaves!  This one had so many points and I do not know what tree it came from but it is pretty!  My daughter brought it to me.

This is a vintage spoon print from a magazine and I chose these drab greenish buttons because they seemed to go with the soft colors of the drying leaf and card.

Then I added the steel crochet hook that is very old, a bitty little shell and then I wrote on the paper and glued a feather at the end of the writing as though it were a quill pen that wrote.
Once I took the picture of my collage to print out and frame or put in a scrapbook, I disassembled it as I did not want to glue the card to the surface or the vintage crochet hook, either, as I still use it.  Picture taken, I then made a smaller collage by using some of the pieces from the first.
   I liked this one, too with some of my crocheting, thread, thimble and cutting out my writing to lay across the sheet.  After I was satisfied with this picture, I removed all but the writing, leaf with little cow picture and spoon print.  I cut out the paper around the points of the leaf to make it more interesting and put it on my Bulletin Board.  Such fun!  You must have favorite things you can collage for pictures to print or scrapbook fun or for card making.  I would love to see what you come up with.  Feel free to copy and paste the vintage card of the little girl and her kitten and use it for yours.
  Thank you so much for coming and do come again soon!  If you have time, please visit my other blogs with the links in the sidebar.
My Krafty Heart to Yours...